Claris Emailer v.2 - Account Setup
|
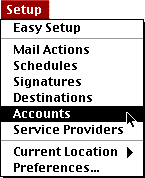
If you're having difficulty setting up your email account in Claris Emailer version 2, follow these instructions. Before you start make sure you have the latest version (2.0v3) installed. If not you can grab it by clicking here. From the Setup menu select Accounts.
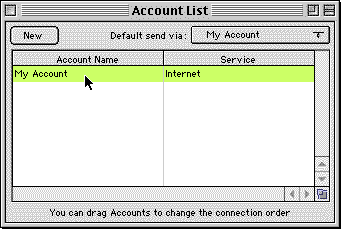
This will bring up the following window:
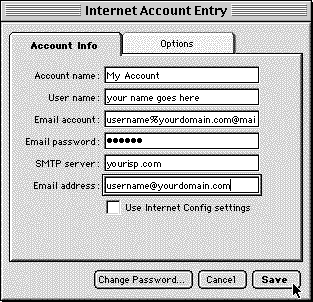
Double click on whatever account is listed in this window. You will see the following window:
Click on Save to save these settings. You can now send and receive email with your MacServe.net email account. NOTE: With Claris Emailer v2, by default the Email Account field will be used as the address to send email within your SMTP server. This can be problematic for some installations. You can instead configure Claris Emailer v2 to use the Email Address field. To do this, download the Emailer Custom Settings addition for Claris Emailer v2 and follow the instructions in the download. |
|||||||||||||
| <<BACK | |||||||||||||