iPhone and iPod Touch Mail - Account Setup
|
If you're having difficulty setting up your email account on a iPhone, iPod, or iTouch versions 2-3.x , follow these instructions.
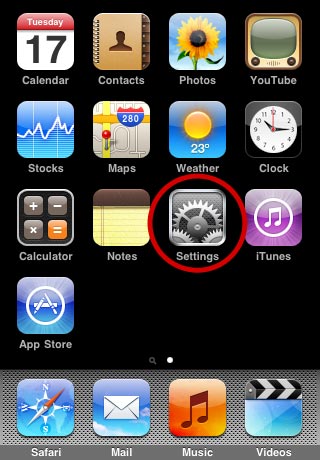
Tap the Settings icon.
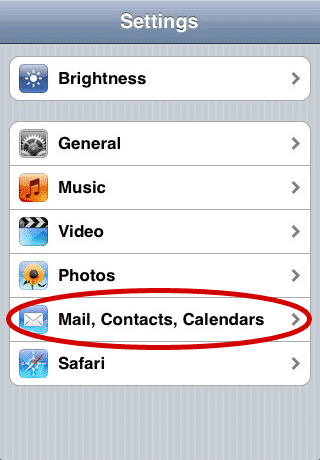
Select Mail, Contacts, Calendars.
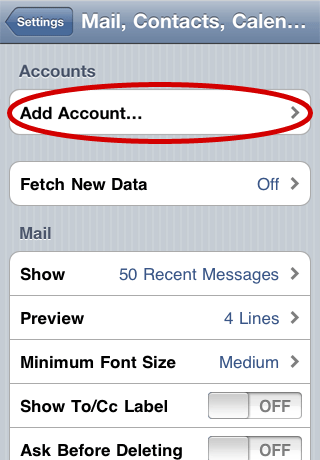
From there select Add Account...
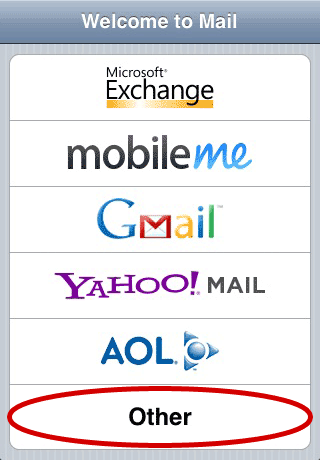
Then you select Other from the bottom of the list.
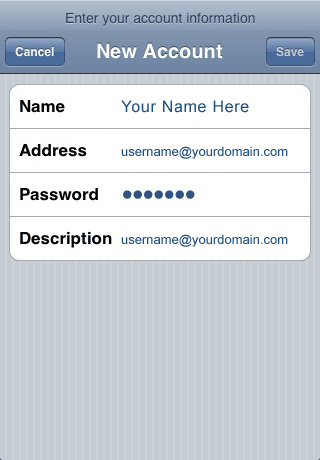
The following screen will open:
Fill in the following information:
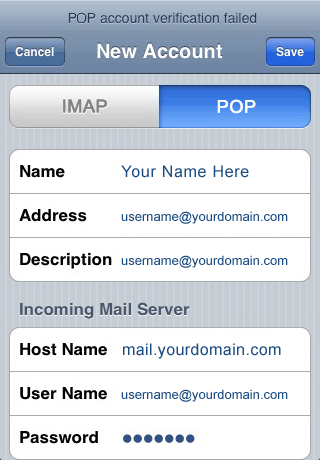
Click Save and the following window will pop up:
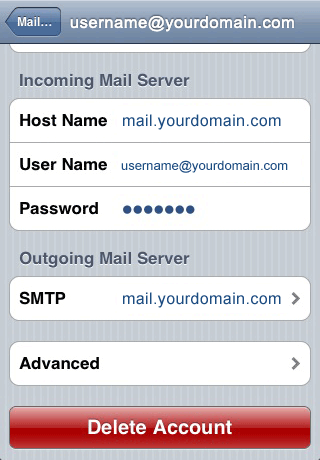
Note: If a "POP account verification failed" warning appears during these steps you can ignore it. This is just the mail app attempting to connect to the server using its default SSL authentication. Select POP from the top and then fill in the following information for Incoming Mail Server:
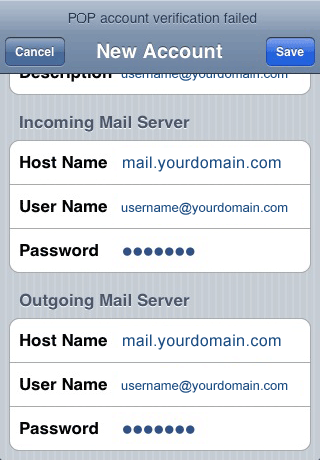
Once you have all the info filled in scroll the screen down:
Fill in the following information for Outgoing Mail Server:
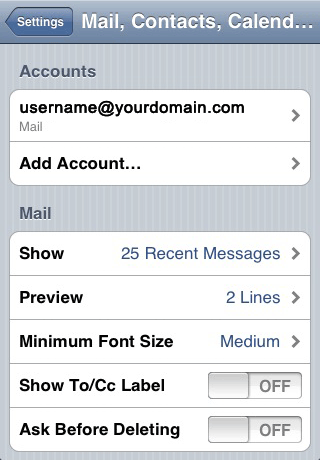
Once you have all the info filled in click Save. This will take you back to the mail account listing screen.
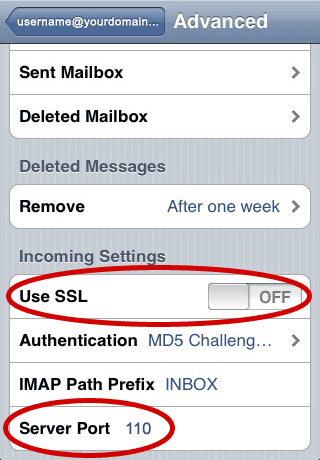
Click on Advanced to get the following screen:
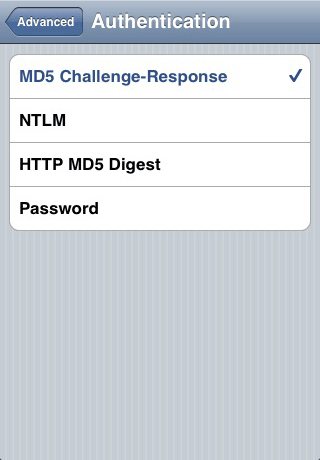
Under Incoming Setting make sure Use SSL is set to OFF and the Server Port is 110. Now select Authentication to see the following:
Make sure MD5 Challenge-Response is checked and then go back two screens and select SMTP.
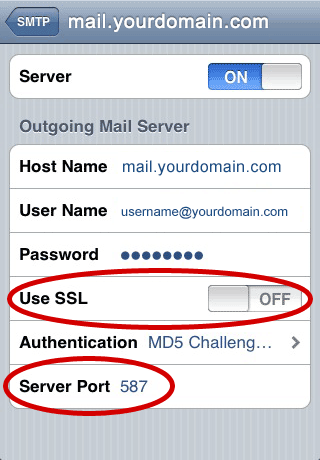
Make sure Use SSL is set to OFF and the Server Port is 587. Follow the same steps from above with Authentication. Once done all you do is back up to the main account settings screen and click Save from the top. You can now send and receive email with your MacServe.net account. |
|||||||||||||||||||||
| << Back to Email Support | |||||||||||||||||||||